NotchToolkit
NotchToolkit is a framework for iOS that allow developers use the iPhone X notch space in creative ways. Inspired by
I was working on this idea of blending app design with the #iPhoneX notch.
— Luboš Volkov📲 🤗 pic.twitter.com/lj2AhxWNeE⚡️ (@0therPlanet) September 18, 2017
| Table of Contents | Description |
|---|---|
| Documentation | Describes the configuration options NotchToolkit offers |
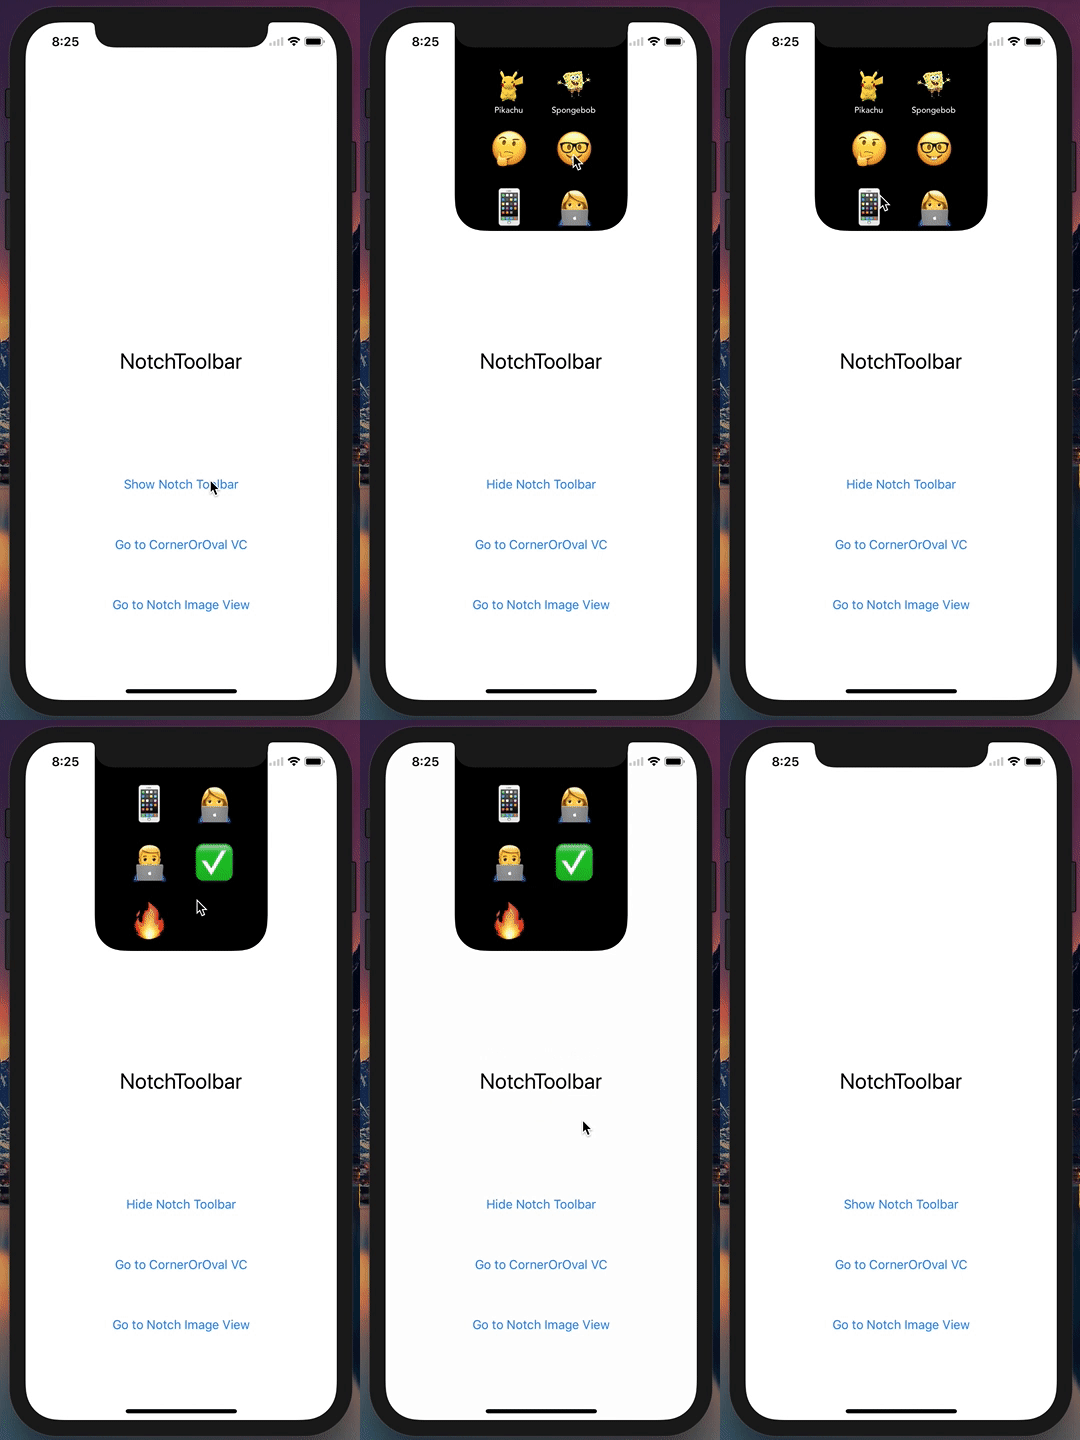
| Preview | Displays preview images of NotchToolkit features |
| Compatibility | Describes the NotchToolkit device and iOS compatibality |
| Example Project | Explains how to run the example project provided in this repository |
| Installation | Describes the CocoaPods, Carthage, and Manual options to install NotchToolkit |
| Implementation | Lists the steps needed to implement NotchToolkit into your project |
| More Options | Describes an extra feature NotchToolkit supports |
| License | Describes NotchToolkit license |
Preview
Compatibility
Although NotchToolkit is made for iPhone X, it can be implemented in older iPhone devices. This framework was tested on:
- iPhone X
- iPhone 8 plus, 7 plus, 6s plus and 6 plus
- iPhone 8, 7, 6s and 6
- iPhone SE and 5s
NotchToolkit requires
- iOS 11
- Swift 3.2 or higher
NotchToolkit has options to customize your Toolbar and UIView,
check Documentation and More Options for more details.
Example Project
To try the example project, simply download this repo then open NotchToolkit-Example.xcworkspace project file, found in the Example folder.
Installation
CocoaPods
- Download CocoaPods using this command in
Terminal
$ sudo gem install cocoapods
- Redirect to your project folder in
Terminal
$ cd YOUR_PROJECT_FILE_PATH
- Initialize a pod in
Terminal
$ pod init
- Open Podfile in a text editor and add this line
pod 'NotchToolkit'
- Go back to
Terminaland install the pod
$ pod install
Carthage
- Add this line to the
Cartfilein your project directory
github "AFathi/NotchToolkit"
- Update your Carthage directory
$ carthage update
Manual
Drag the NotchToolkit.xcodeproj file into your project then add NotchToolkit as an embedded binary of your targets.
Implement in your project
import NotchToolkitin aUIViewControllerclass- Add
NotchToolbarDelegatein the delegate section
class ViewController: UIViewController, NotchToolbarDelegate
- Add delegate methods
//A protocol method that's triggered when the device rotates.
func deviceDidRotate() {
}

//A protocol method that's triggered when an icon is selected.
func didTapToolIcon(_ tools: UICollectionView, toolIndex: IndexPath, section: Int, row: Int) {
}
- Create a
NotchToolbarglobal variable
let toolbar = NotchToolbar()
- Configure and initialize
toolbarinviewDidLoad
toolbar.notch.isVisible = true
toolbar.notch.height = 250
toolbar.toolList = [
//[icon image, title]
[UIImage(named:"pikachusquare")!, "Pikachu"],
//only image icons
UIImage(named:"spongebob")!,
//only string icons (mainly for emojis 😉)
"🤔", "🤓",
"📱", "👩💻",
"👨💻", "✅", "🔥"]
toolbar.delegate = self
toolbar.initializeToolbar(self)
- Call
autoResize()method in thedeviceDidRotatedelegate method
func deviceDidRotate() {
toolbar.autoResize()
}
You're all set!
Show and Hide toolbar
showOrHide()
This method allows you to show and hide the NotchToolbar. You can call this method in an IBAction that handles showing/hiding the toolbar.
@IBAction func buttonClicked(_ sender: UIButton) {
toolbar.showOrHide()
}
Handle Icon Selection
- Make sure you set the
NotchToolbardelegate toself. - Handle the icon selection in the
didTapToolIcondelegate method:
func didTapToolIcon(_ tools: UICollectionView, toolIndex: IndexPath, section: Int, row: Int) {
if row == 0 {
print("first icon")
}else if row == 1 {
print("second icon")
}
}
More Options
This framework include a UIView extension that allow you draw a notch bezier path to any UIView class or subclass.
draw(_ notch:curveType, position:curvePosition, curve:CGFloat?, customBounds:CGRect? = nil)
This is a UIView extension that allows you add ovals and rounded corners to any UIView.
- For type
oval, setcurvescale from 1.0 - 10.0. - For type
corner,curveis the radius size. - Check
curveType&curvePositionfor more info.
Example
//horizontalSides draws an oval-based bezier path vertically on the right & left sides of a view.
myView.draw(.oval, position: .horizontalSides, curve: 1.5)

//diagonalAC draws rounded rectangle corners diagonally from topLeft to bottomRight of a view.
myView.draw(.corner, position: .diagonalAC, curve: 35)
Preview
LICENSE
NotchToolkit is under MIT license. Check the LICENSE file for more details.


