WKZombie


![]()
WKZombie is an iOS/OSX web-browser without a graphical user interface. It was developed as an experiment in order to familiarize myself with using functional concepts written in Swift 4.
It incorporates WebKit (WKWebView) for rendering and hpple (libxml2) for parsing the HTML content. In addition, it can take snapshots and has rudimentary support for parsing/decoding JSON elements. Chaining asynchronous actions makes the code compact and easy to use.
Use Cases
There are many use cases for a Headless Browser. Some of them are:
- Collect data without an API
- Scraping websites
- Automating interaction of websites
- Manipulation of websites
- Running automated tests / snapshots
- etc.
Example
The following example is supposed to demonstrate the WKZombie functionality. Let's assume that we want to show all iOS Provisioning Profiles in the Apple Developer Portal.
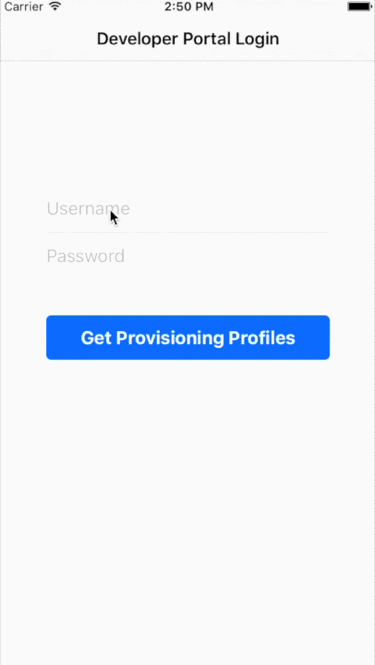
Manual Web-Browser Navigation
When using a common web-browser (e.g. Mobile Safari) on iOS, you would typically type in your credentials, sign in and navigate (via links) to the Provisioning Profiles section:

Automation with WKZombie
The same navigation process can be reproduced automatically within an iOS/OSX app linking WKZombie Actions. In addition, it is now possible to manipulate or display this data in a native way with UITextfield, UIButton and a UITableView.
Take a look at the iOS/OSX demos in the Example directory to see how to use it.
Getting Started
iOS / OSX
The best way to get started is to look at the sample project. Just run the following commands in your shell and you're good to go:
$ cd Example
$ pod install
$ open Example.xcworkspace
Note: You will need CocoaPods 1.0 beta4 or higher.
Command-Line
For a Command-Line demo, run the following commands inside the WKZombie root folder:
$ swift build -Xcc -I/usr/include/libxml2 -Xlinker -lxml2

$ .build/debug/Example
Usage
A WKZombie instance equates to a web session. Top-level convenience methods like WKZombie.open() use a shared instance, which is configured with the default settings.
As such, the following three statements are equivalent:
let action : Action<HTMLPage> = open(url)
let action : Action<HTMLPage> = WKZombie.open(url)
let browser = WKZombie.sharedInstance
let action : Action<HTMLPage> = browser.open(url)
Applications can also create their own WKZombie instance:
self.browser = WKZombie(name: "Demo")
Be sure to keep browser in a stored property for the time of being used.
a. Chaining Actions
Web page navigation is based on Actions, that can be executed implicitly when chaining actions using the >>> or >>* (for snapshots) operators. All chained actions pass their result to the next action. The === operator then starts the execution of the action chain.
The following snippet demonstrates how you would use WKZombie to collect all Provisioning Profiles from the Developer Portal and take snapshots of every page:
    open(url)
>>* get(by: .id("accountname"))
>>> setAttribute("value", value: user)
>>* get(by: .id("accountpassword"))
>>> setAttribute("value", value: password)
>>* get(by: .name("form2"))
>>> submit
>>* get(by: .contains("href", "/account/"))
>>> click(then: .wait(2.5))
>>* getAll(by: .contains("class", "row-"))
=== myOutput
In order to output or process the collected data, one can either use a closure or implement a custom function taking the result as parameter:
func myOutput(result: [HTMLTableColumn]?) {
  // handle result
}
or
func myOutput(result: Result<[HTMLTableColumn]>) {
  switch result {
  case .success(let value): // handle success
  case .error(let error): // handle error
  }
}
b. Manual Actions
Actions can also be started manually by calling the start() method:
let action : Action<HTMLPage> = browser.open(url)

action.start { result in
    switch result {
    case .success(let page): // process page
    case .error(let error):  // handle error
    }
}
This is certainly the less complicated way, but you have to write a lot more code, which might become confusing when you want to execute Actions successively.
Basic Action Functions
There are currently a few Actions implemented, helping you visit and navigate within a website:
Open a Website
The returned WKZombie Action will load and return a HTML or JSON page for the specified URL.
func open<T : Page>(url: URL) -> Action<T>
Optionally, a PostAction can be passed. This is a special wait/validation action, that is performed after the page has finished loading. See PostAction for more information.
func open<T : Page>(then: PostAction) -> (url: URL) -> Action<T>
Get the current Website
The returned WKZombie Action will retrieve the current page.
func inspect<T: Page>() -> Action<T>
Submit a Form
The returned WKZombie Action will submit the specified HTML form.
func submit<T : Page>(form: HTMLForm) -> Action<T>
Optionally, a PostAction can be passed. See PostAction for more information.
func submit<T : Page>(then: PostAction) -> (form: HTMLForm) -> Action<T>
Click a Link / Press a Button
The returned WKZombie Actions will simulate the interaction with a HTML link/button.
func click<T: Page>(link : HTMLLink) -> Action<T>
func press<T: Page>(button : HTMLButton) -> Action<T>
Optionally, a PostAction can be passed. See [PostAction](#Special- Parameters) for more information.
func click<T: Page>(then: PostAction) -> (link : HTMLLink) -> Action<T>
func press<T: Page>(then: PostAction) -> (button : HTMLButton) -> Action<T>
Note: HTMLButton only works if the "onClick" HTML-Attribute is present. If you want to submit a HTML form, you should use Submit instead.
Find HTML Elements
The returned WKZombie Action will search the specified HTML page and return the first element matching the generic HTML element type and passed SearchType.
func get<T: HTMLElement>(by: SearchType<T>) -> (page: HTMLPage) -> Action<T>
The returned WKZombie Action will search and return all elements matching.
func getAll<T: HTMLElement>(by: SearchType<T>) -> (page: HTMLPage) -> Action<[T]>
Set an Attribute
The returned WKZombie Action will set or update an existing attribute/value pair on the specified HTMLElement.
func setAttribute<T: HTMLElement>(key: String, value: String?) -> (element: T) -> Action<HTMLPage>
Execute JavaScript
The returned WKZombie Actions will execute a JavaScript string.
func execute(script: JavaScript) -> (page: HTMLPage) -> Action<JavaScriptResult>
func execute(script: JavaScript) -> Action<JavaScriptResult>
For example, the following example shows how retrieve the title of the currently loaded website using the execute() method:
    browser.inspect
>>> browser.execute("document.title")
=== myOutput

func myOutput(result: JavaScriptResult?) {
  // handle result
}
The following code shows another way to execute JavaScript, that is e.g. value of an attribute:
    browser.open(url)
>>> browser.get(by: .id("div"))
>>> browser.map { $0.objectForKey("onClick")! }
>>> browser.execute
>>> browser.inspect
=== myOutput

func myOutput(result: HTMLPage?) {
  // handle result
}
Fetching
Some HTMLElements, that implement the HTMLFetchable protocol (e.g. HTMLLink or HTMLImage), contain attributes like "src" or "href", that link to remote objects or data. The following method returns a WKZombie Action that can conveniently download this data:
func fetch<T: HTMLFetchable>(fetchable: T) -> Action<T>
Once the fetch method has been executed, the data can be retrieved and converted. The following example shows how to convert data, fetched from a link, into an UIImage:
let image : UIImage? = link.fetchedContent()
Fetched data can be converted into types, that implement the HTMLFetchableContent protocol. The following types are currently supported:
- UIImage / NSImage
- Data
Note: See the OSX example for more info on how to use this.
Transform
The returned WKZombie Action will transform a WKZombie object into another object using the specified function f.
func map<T, A>(f: T -> A) -> (element: T) -> Action<A>
This function transforms an object into another object using the specified function f.
func map<T, A>(f: T -> A) -> (object: T) -> A
Taking Snapshots
Taking snapshots is available for iOS. First, a snapshotHandler must be registered, that will be called each time a snapshot has been taken:
WKZombie.sharedInstance.snapshotHandler = { snapshot in
    let image = snapshot.image
}
Secondly, adding the >>* operator will trigger the snapshot event:
    open(url)
>>* get(by: .id("element"))
=== myOutput
Note: This operator only works with the WKZombie shared instance.
Alternatively, one can use the snap command:
    browser.open(url)
>>> browser.snap
>>> browser.get(by: .id("element"))
=== myOutput
Take a look at the iOS example for more information of how to take snapshots.
Special Parameters
1. PostAction
Some Actions, that incorporate a (re-)loading of webpages (e.g. open, submit, etc.), have PostActions available. A PostAction is a wait or validation action, that will be performed after the page has finished loading:
| PostAction | Description |
|---|---|
| wait (Seconds) | The time in seconds that the action will wait (after the page has been loaded) before returning. This is useful in cases where the page loading has been completed, but some JavaScript/Image loading is still in progress. |
| validate (Javascript) | The action will complete if the specified JavaScript expression/script returns 'true' or a timeout occurs. |
2. SearchType
In order to find certain HTML elements within a page, you have to specify a SearchType. The return type of get() and getAll() is generic and determines which tag should be searched for. For instance, the following would return all links with the class book:
let books : Action<HTMLLink> = browser.getAll(by: .class("book"))(page: htmlPage)
The following 6 types are currently available and supported:
| SearchType | Description |
|---|---|
| id (String) | Returns an element that matches the specified id. |
| name (String) | Returns all elements matching the specified value for their name attribute. |
| text (String) | Returns all elements with inner content, that contain the specified text. |
| class (String) | Returns all elements that match the specified class name. |
| attribute (String, String) | Returns all elements that match the specified attribute name/value combination. |
| contains (String, String) | Returns all elements with an attribute containing the specified value. |
| XPathQuery (String) | Returns all elements that match the specified XPath query. |
Operators
The following Operators can be applied to Actions, which makes chained Actions easier to read:
| Operator | iOS | OSX | Description |
|---|---|---|---|
>>> |
x | x | This Operator equates to the andThen() method. Here, the left-hand side Action will be started and the result is used as parameter for the right-hand side Action. Note: If the right-hand side Action doesn't take a parameter, the result of the left-hand side Action will be ignored and not passed. |
>>* |
x | This is a convenience operator for the snap command. It is equal to the >>> operator with the difference that a snapshot will be taken after the left Action has been finished. Note: This operator throws an assert if used with any other than the shared instance. |
|
=== |
x | x | This Operator starts the left-hand side Action and passes the result as Optional to the function on the right-hand side. |
Authentication
Once in a while you might need to handle authentication challenges e.g. Basic Authentication or Self-signed Certificates. WKZombie provides an authenticationHandler, which is invoked when the internal web view needs to respond to an authentication challenge.
Basic Authentication
The following example shows how Basic Authentication could be handled:
browser.authenticationHandler = { (challenge) -> (URLSession.AuthChallengeDisposition, URLCredential?) in
	return (.useCredential, URLCredential(user: "user", password: "passwd", persistence: .forSession))
}
Self-signed Certificates
In case of a self-signed certificate, you could use the authentication handler like this:
browser.authenticationHandler = { (challenge) -> (URLSession.AuthChallengeDisposition, URLCredential?) in
	return (.useCredential, URLCredential(trust: challenge.protectionSpace.serverTrust!))
}
Advanced Action Functions
Batch
The returned WKZombie Action will make a bulk execution of the specified action function f with the provided input elements. Once all actions have finished executing, the collected results will be returned.
func batch<T, U>(f: T -> Action<U>) -> (elements: [T]) -> Action<[U]>
Collect
The returned WKZombie Action will execute the specified action (with the result of the previous action execution as input parameter) until a certain condition is met. Afterwards, it will return the collected action results.
func collect<T>(f: T -> Action<T>, until: T -> Bool) -> (initial: T) -> Action<[T]>
Swap
Note: Due to a XPath limitation, WKZombie can't access elements within an iframe directly. The swap function can workaround this issue by switching web contexts.
The returned WKZombie Action will swap the current page context with the context of an embedded